Overview
Metrifox supports direct integrations with popular payment gateways to process transactions, subscriptions, and recurring billing. Connecting a provider enables:- Automatic invoice generation and payment collection.
- Recurring subscriptions with retries and webhooks.
- Secure PCI-compliant handling (no card data stored in Metrifox).
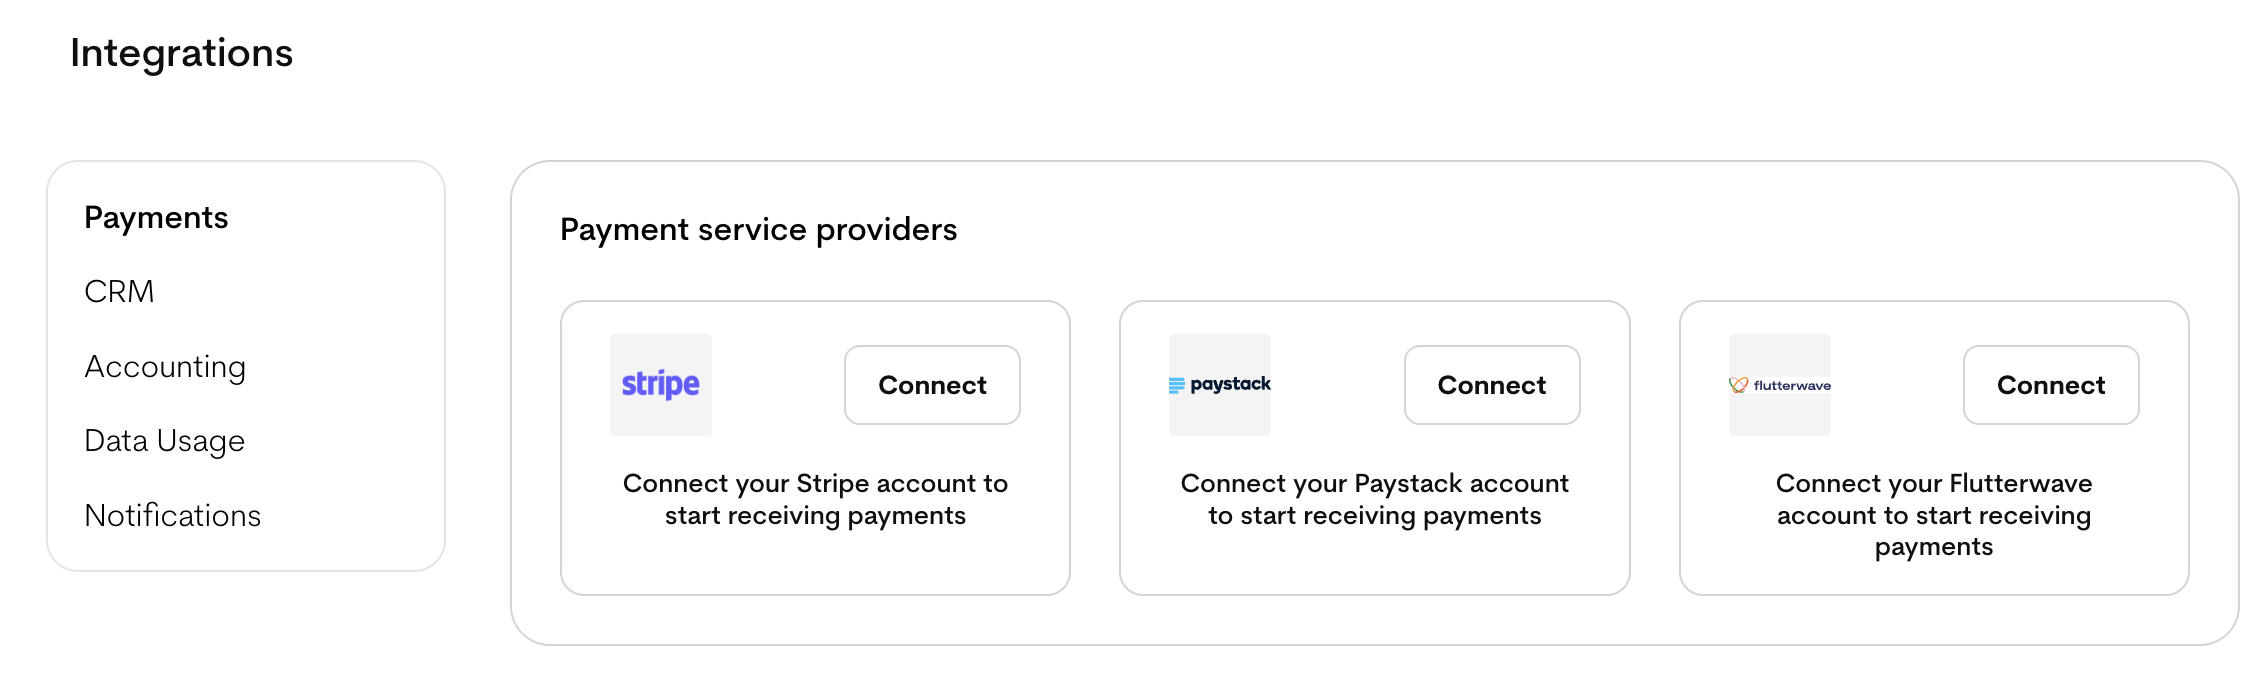
- Paystack (recommended for Nigeria/Africa-focused businesses — lower fees, fast payouts).
- Stripe (global reach, multi-currency).
- Flutterwave (supports payments across more African countries and local methods).
Connecting a Payment Provider
- Log in to your Metrifox dashboard.
- Navigate to Integrations from the sidebar
- In the Payment Providers section, click Connect next to the provider you choose to use.
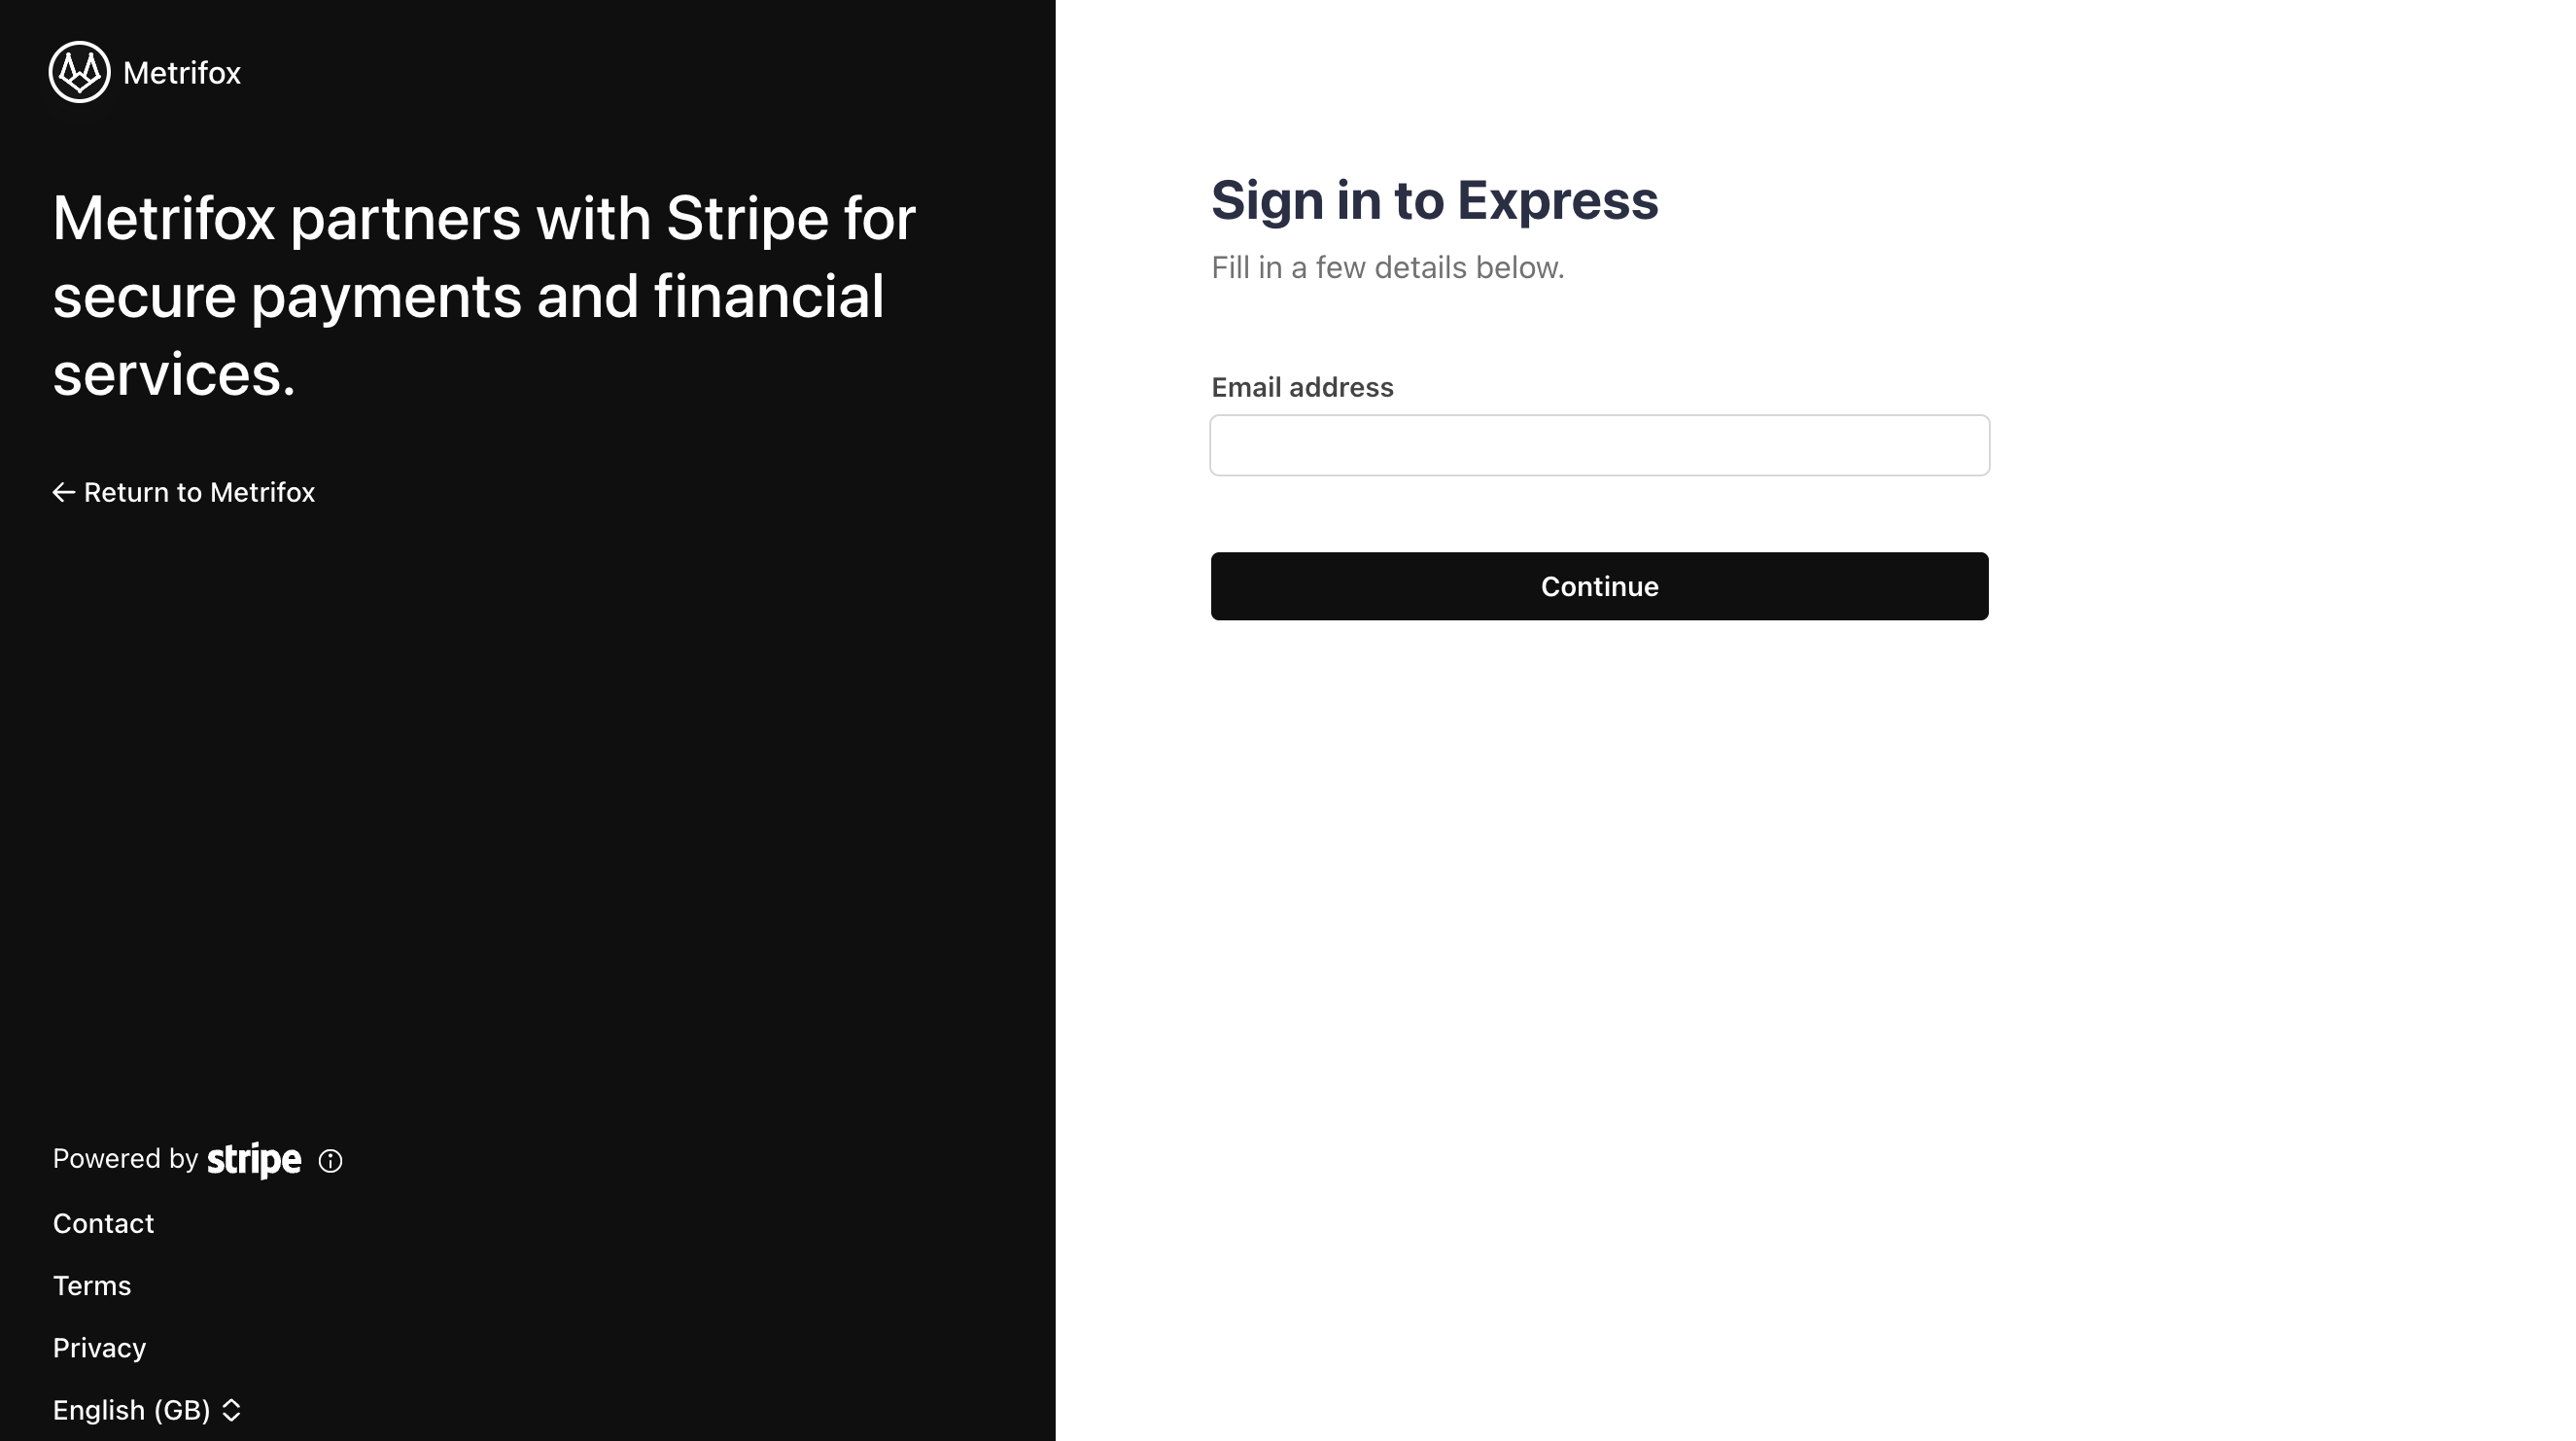
Connecting Stripe
- Clicking the Connect button next to Stripe. This opens a new tab to Stripe Express onboarding.
-
In the Stripe tab:
- Sign in to an existing Stripe account or create one.
- Fill in required details (email, business info).
- Authorize Metrifox to connect.
Connecting Paystack
- Click Connect next to Paystack
- In the modal:
- Enter your Public Key and Secret Key (from Paystack Dashboard → Settings → API Keys & Webhooks).
-
Important: Copy the webhook URL shown (https://api.metrifox.com/api/v1/payments/paystack/webhooks).
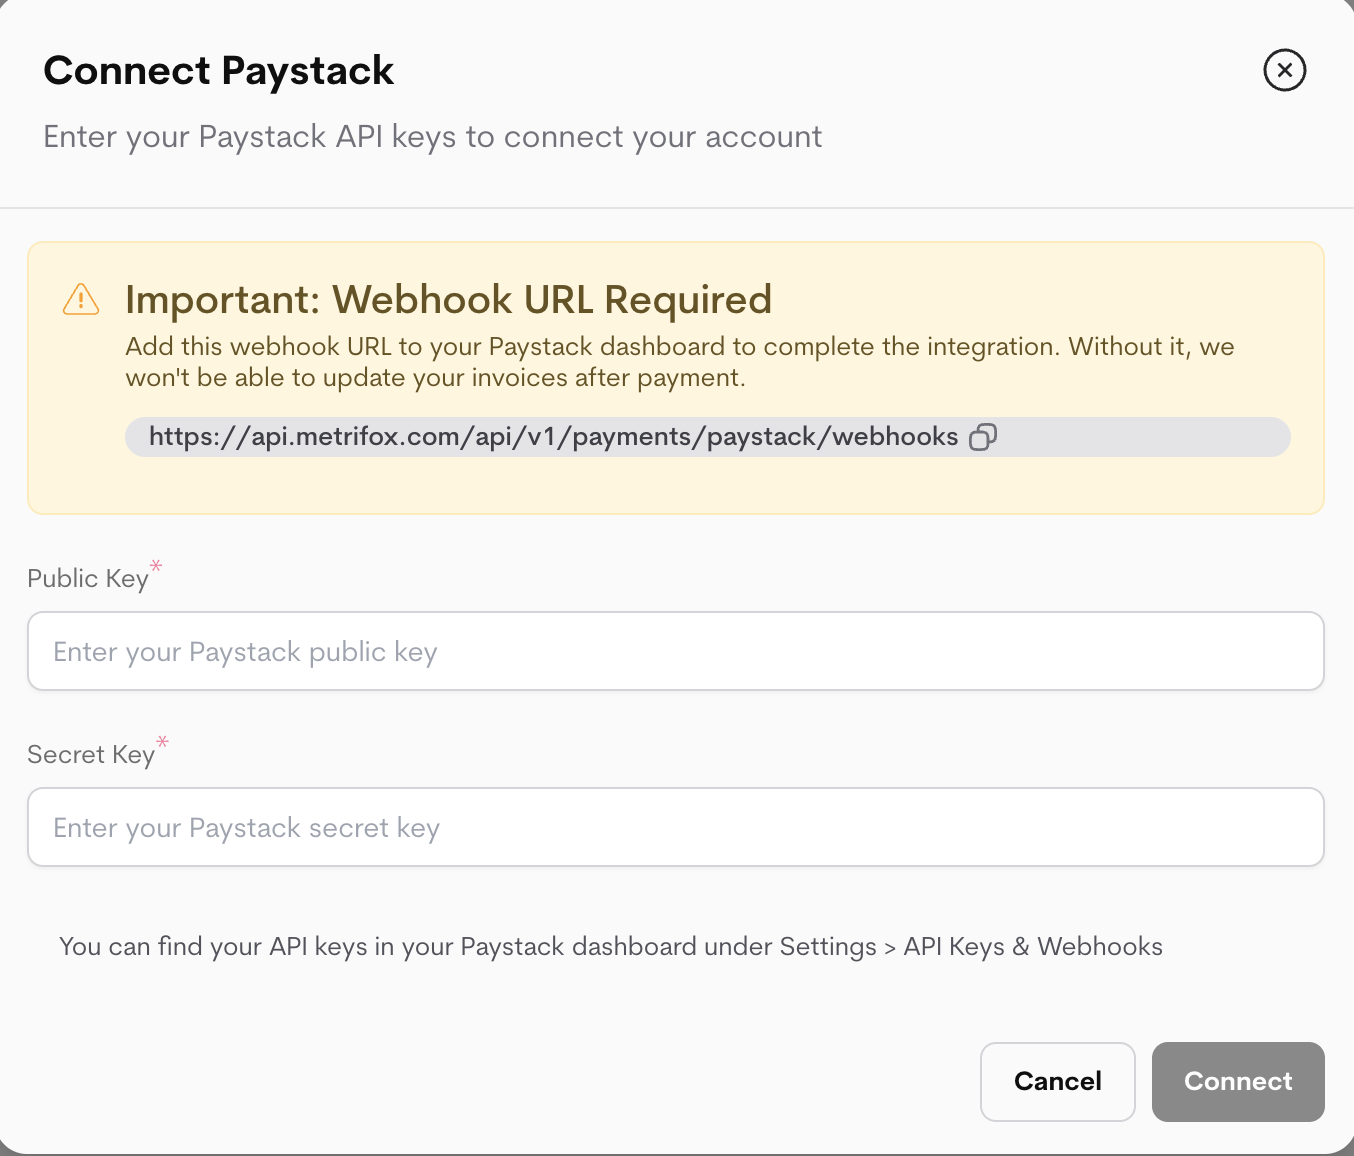
- Click Connect.
- Manually add the webhook in Paystack:
- Log in to Paystack Dashboard.
- Go to Settings → API Keys & Webhooks.
- Paste the Metrifox webhook URL.
- Save.
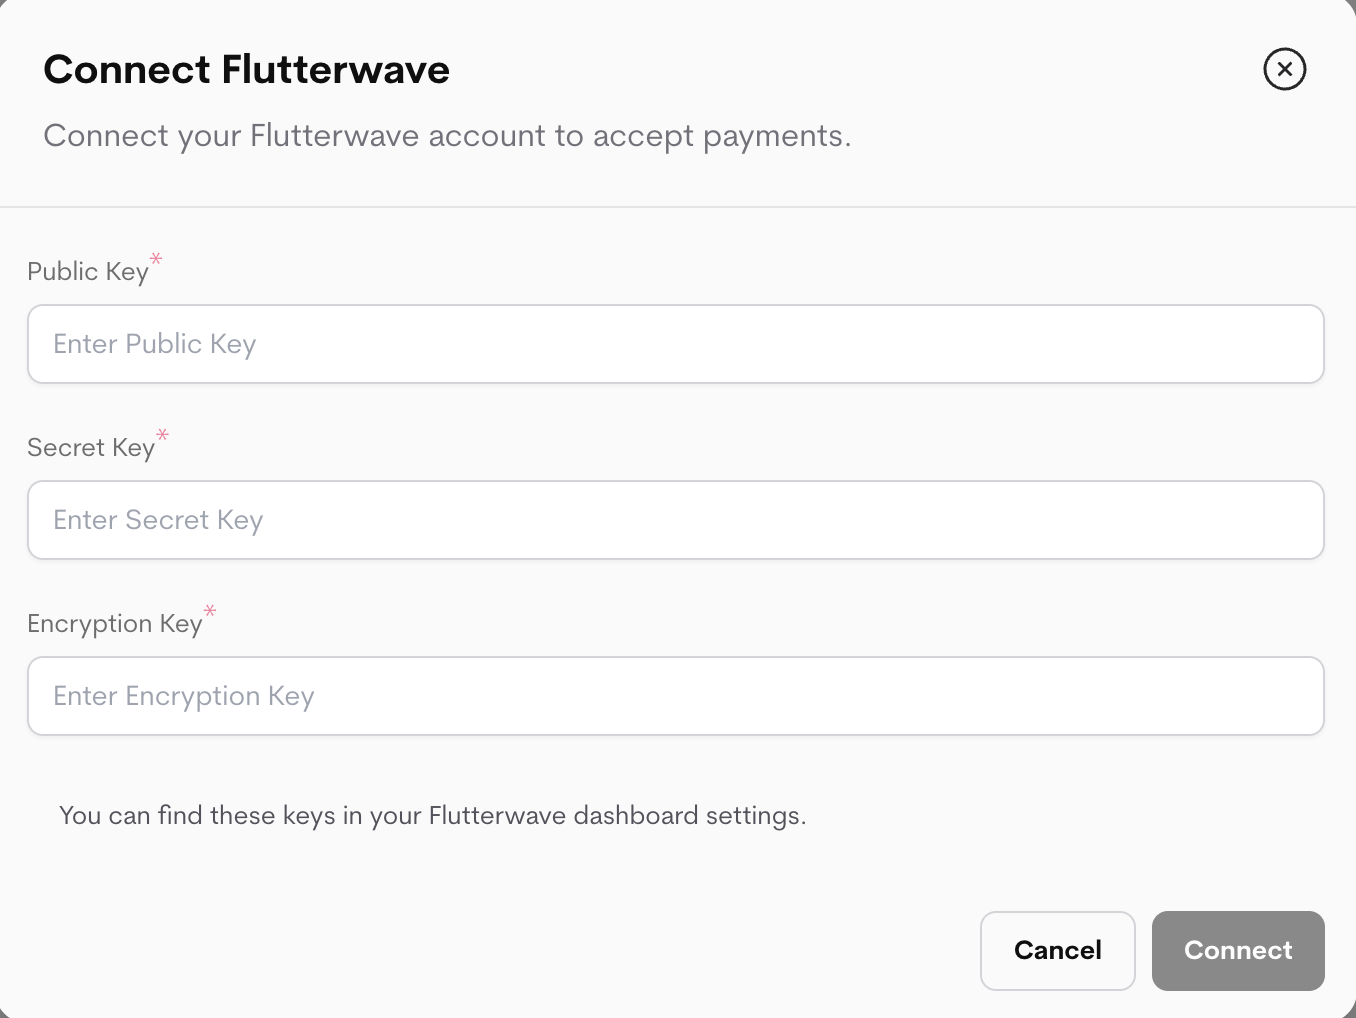
Connecting Flutterwave
- Click Connect next to Flutterwave.
-
In the modal:
-
Enter your Public Key, **Secret Key **and Encryption key (from Flutterwave Dashboard → Settings → API Keys).
-
Enter your Public Key, **Secret Key **and Encryption key (from Flutterwave Dashboard → Settings → API Keys).
- Click Connect.
- On success, a new modal (or section) displays the Webhook URL and Webhook Secret/Hash. Important: Copy both immediately and save them securely (e.g. in a password manager or notes). They are shown only after successful connection as you’ll need them to configure the webhook later on in Flutterwave.
-
Manually configure the webhook in Flutterwave:
- Log in to Flutterwave Dashboard.
- Go to Settings → Webhooks.
- Paste the Webhook URL
- Enter the Webhook Hash as the verification secret.
- Save.
Manual Bank Payments (Alternative)
Not every business needs a PSP. If you prefer to collect payments out-of-band — bank transfer, cash, cheque, offline — Metrifox supports that natively. You can use this on its own, or alongside a connected PSP. Step 1 — Add your business bank account- Go to Settings → General → Business Bank Account. (Direct link)
- Enter your bank name, account number, and account name.
- Save.
- Go to Billings → Invoices and open the invoice the payment is for. (Invoices page)
- Click Record Manual Payment.
- Enter the amount paid, the payment date, and an optional reference (e.g. bank transaction ID).
- Save. The invoice is marked paid (or partially paid), and any gated subscription is activated.
- Use a PSP if you want automatic card charging, retries, and hands-off renewals.
- Use manual payments if your customers pay by bank transfer or you operate in a market where card-on-file is uncommon.
- Both together is supported: a PSP handles card-paying customers automatically, and you record bank transfers manually for the rest.