Overview
Products help you organize your offerings. You can group related plans, add-ons, or single purchases under a single product to structure your catalog logically (e.g., a “Cloud Hosting” product containing “Basic,” “Pro,” and “Enterprise” plans).Creating a Product
To create a product,- Navigate to Catalog → Products
- Click “Create a Product”
- Define Product Details
| Field | Description | Recommendations |
|---|---|---|
| Name | The internal and customer-facing name of the product. | Use a clear, descriptive name (e.g., “Website Security Suite” or “Premium AI Platform”). |
| Description | (Optional) Details about the product’s purpose and what it includes. | Helpful for internal teams to identify the product’s use case. |
| Product Key | A unique, machine-readable identifier for the product. | Auto-generated, but can be customized for API or integration purposes (e.g., website_security_suite). |
| Default Currency | The primary currency used for pricing this product and its plans/add-ons. | This is set to your workspace’s base currency by default. You can select from the dropdown. You cannot change it after the product is created. |
| Product Image | A visual representation of the product. | Click to upload or drag and drop files here. Supported formats: JPEG, PNG, WEBP. Max file size: 2MB. |
-
Click “Create Product”
Once created, you can begin adding Plans, Add-ons and Single purchases to this product.

Activating a product
To start selling a product, you must activate it. Activating a product signals that it’s ready for customers, enabling Metrifox to generate pricing tables, process transactions, and display the product in your catalog. To activate a product,- Navigate to Catalog → Products.
-
Locate and select the product from the list.
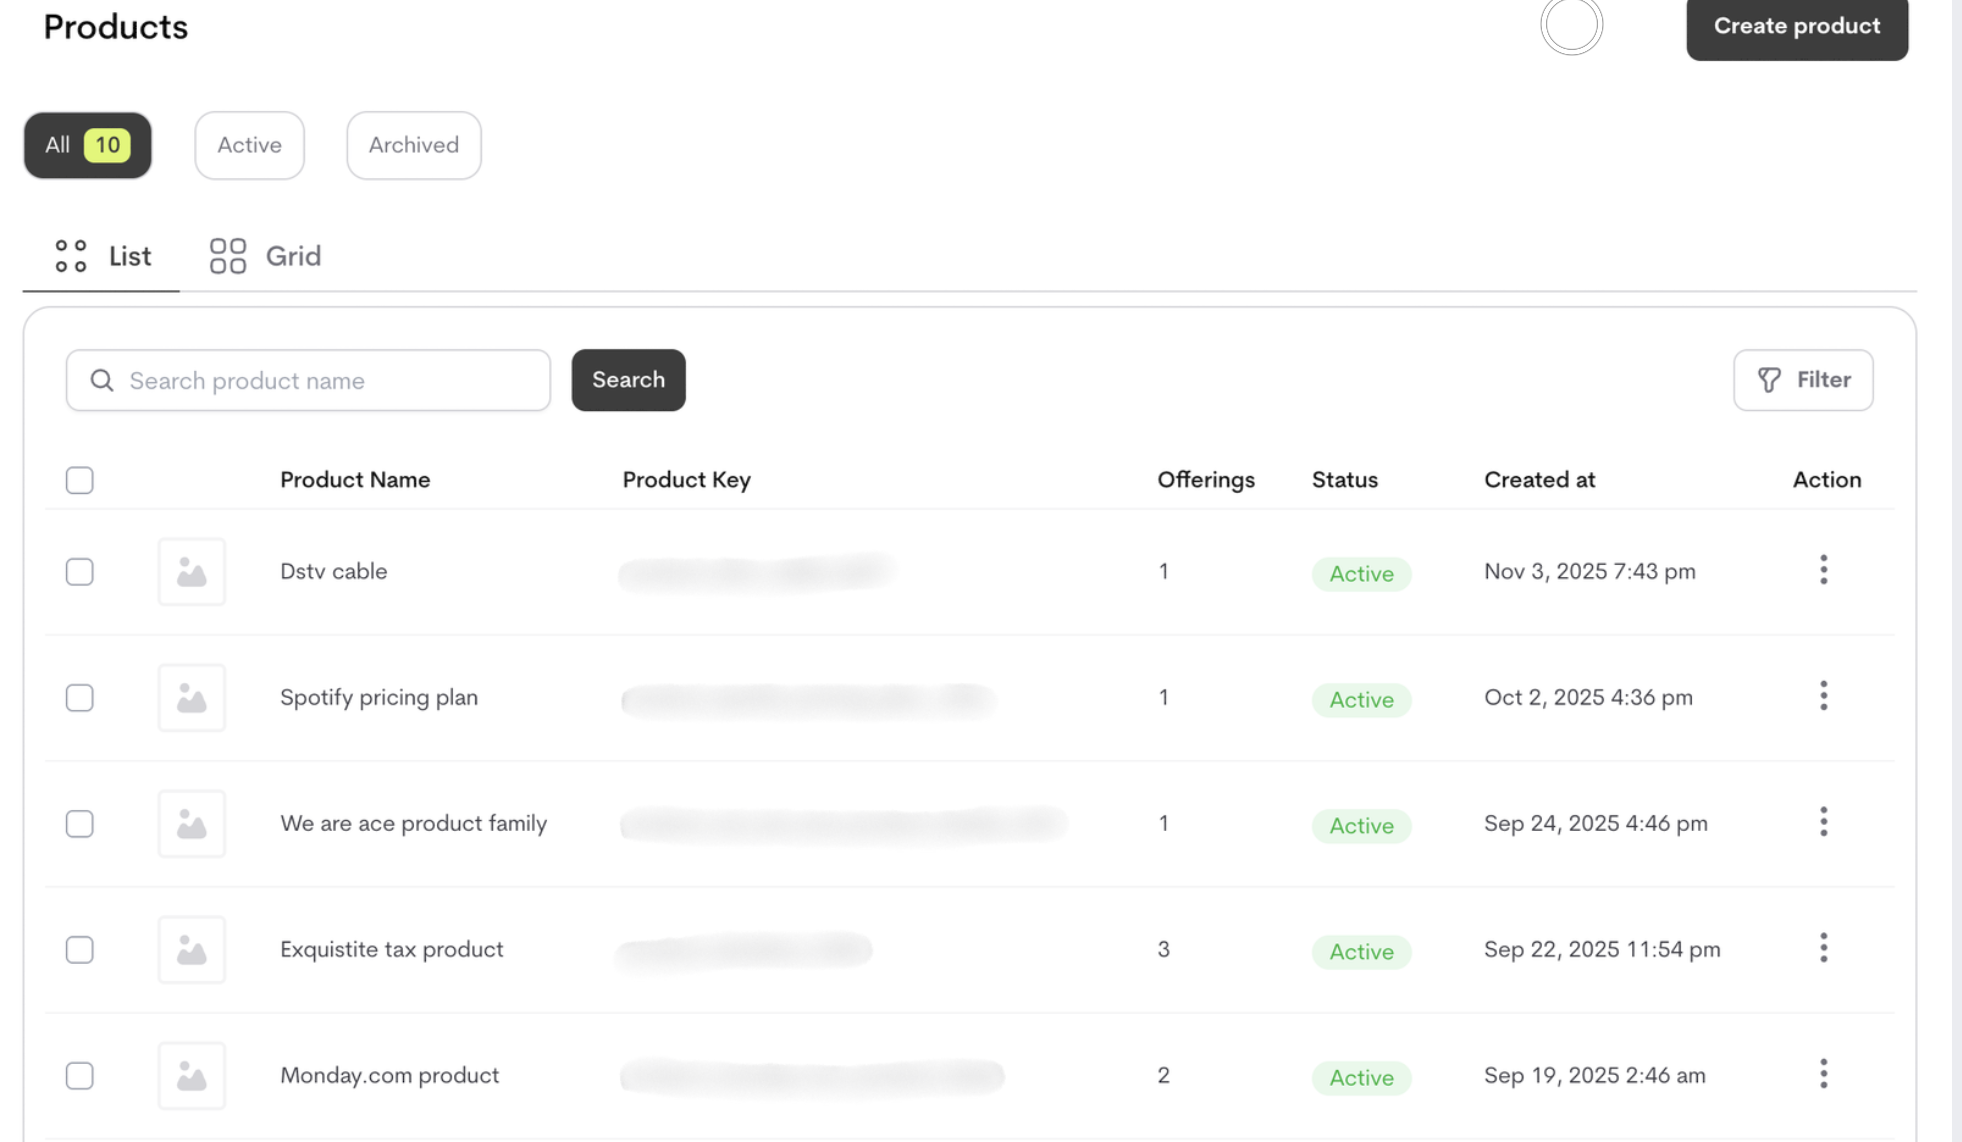
- Click the Activate button (or toggle) next to the product.
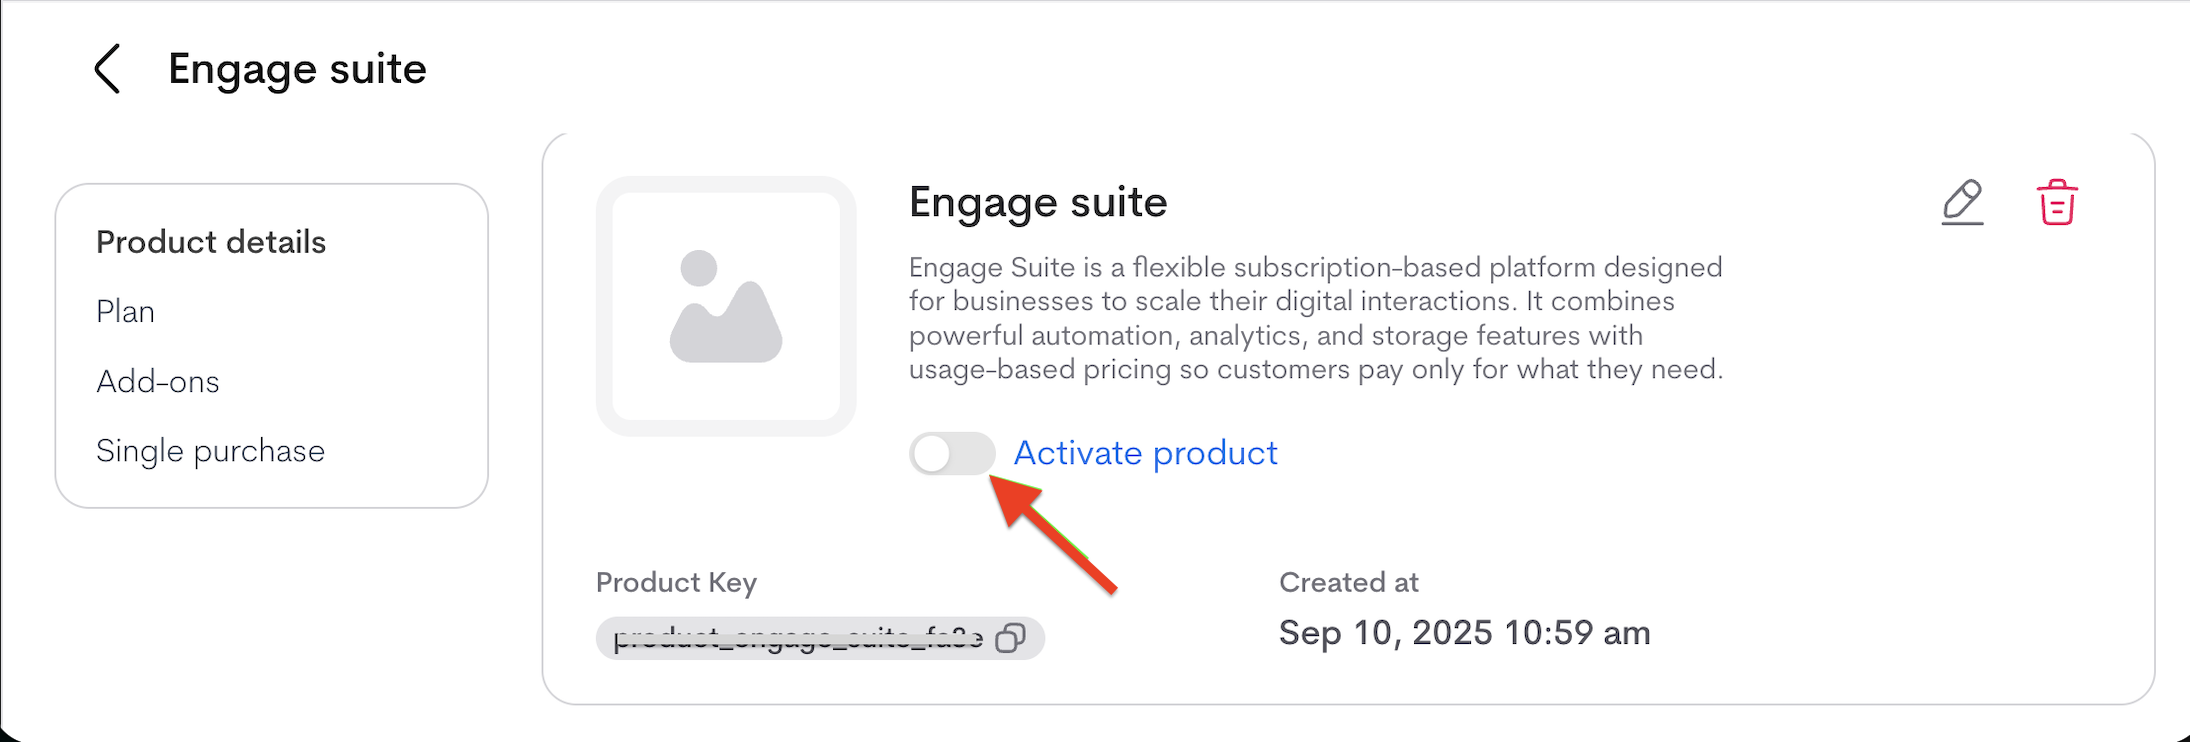
- A shareable checkout link is generated. When opened, it displays the product’s pricing and allows customers to complete payment.
-
The product must have at least one launched offering (plan, add-on, or single purchase) attached to the product, or else an error is displayed :
You must have launched at least one offering to activate your product.
Managing Your Products
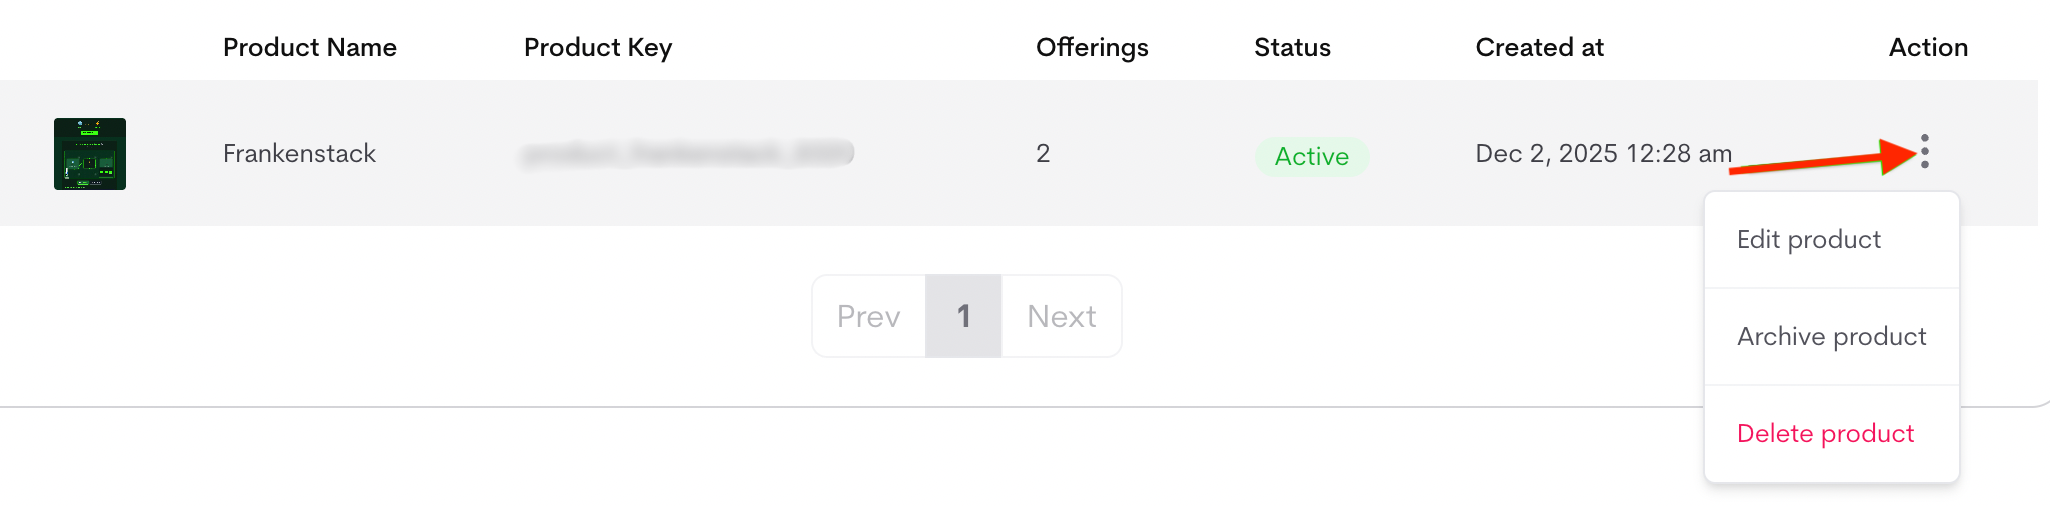
From the product list, click the three dots (⋮) menu next to any product to access management options.Actions:
- Edit: Update product details (name, description, image). The product key and default currency cannot be edited.
-
Archive: Temporarily hide the product from active use (e.g., for seasonal offerings). Archived products remain in your admin list but are not visible to customers or in pricing tables. You can unarchive them later at any time. If you archive a product, consider notifying customers or updating your pricing pages
Why Archive?
This is the recommended option when a product is no longer in use but has past customer purchases or subscriptions -
Delete: Permanently remove the product and all associated offerings. This action cannot be undone and will remove all related pricing and configuration.
Conditions for Deleting a Product
You cannot delete a product if it has:
- Active subscriptions (any customer currently subscribed to its plans or add-ons) .
- Past billing history - If the product (or any of its offerings) was ever purchased and appeared on customer invoices (even from months or years ago).
- Go to Catalog → Products.
- Locate the product you want to manage in the list.
- Click the three dots (⋮) icon next to it.
- Select the desired action (Edit, Archive, or Delete).
- For Edit: Update fields in the modal and click Save product.
- For Archive/Delete: Confirm the action in the prompt.