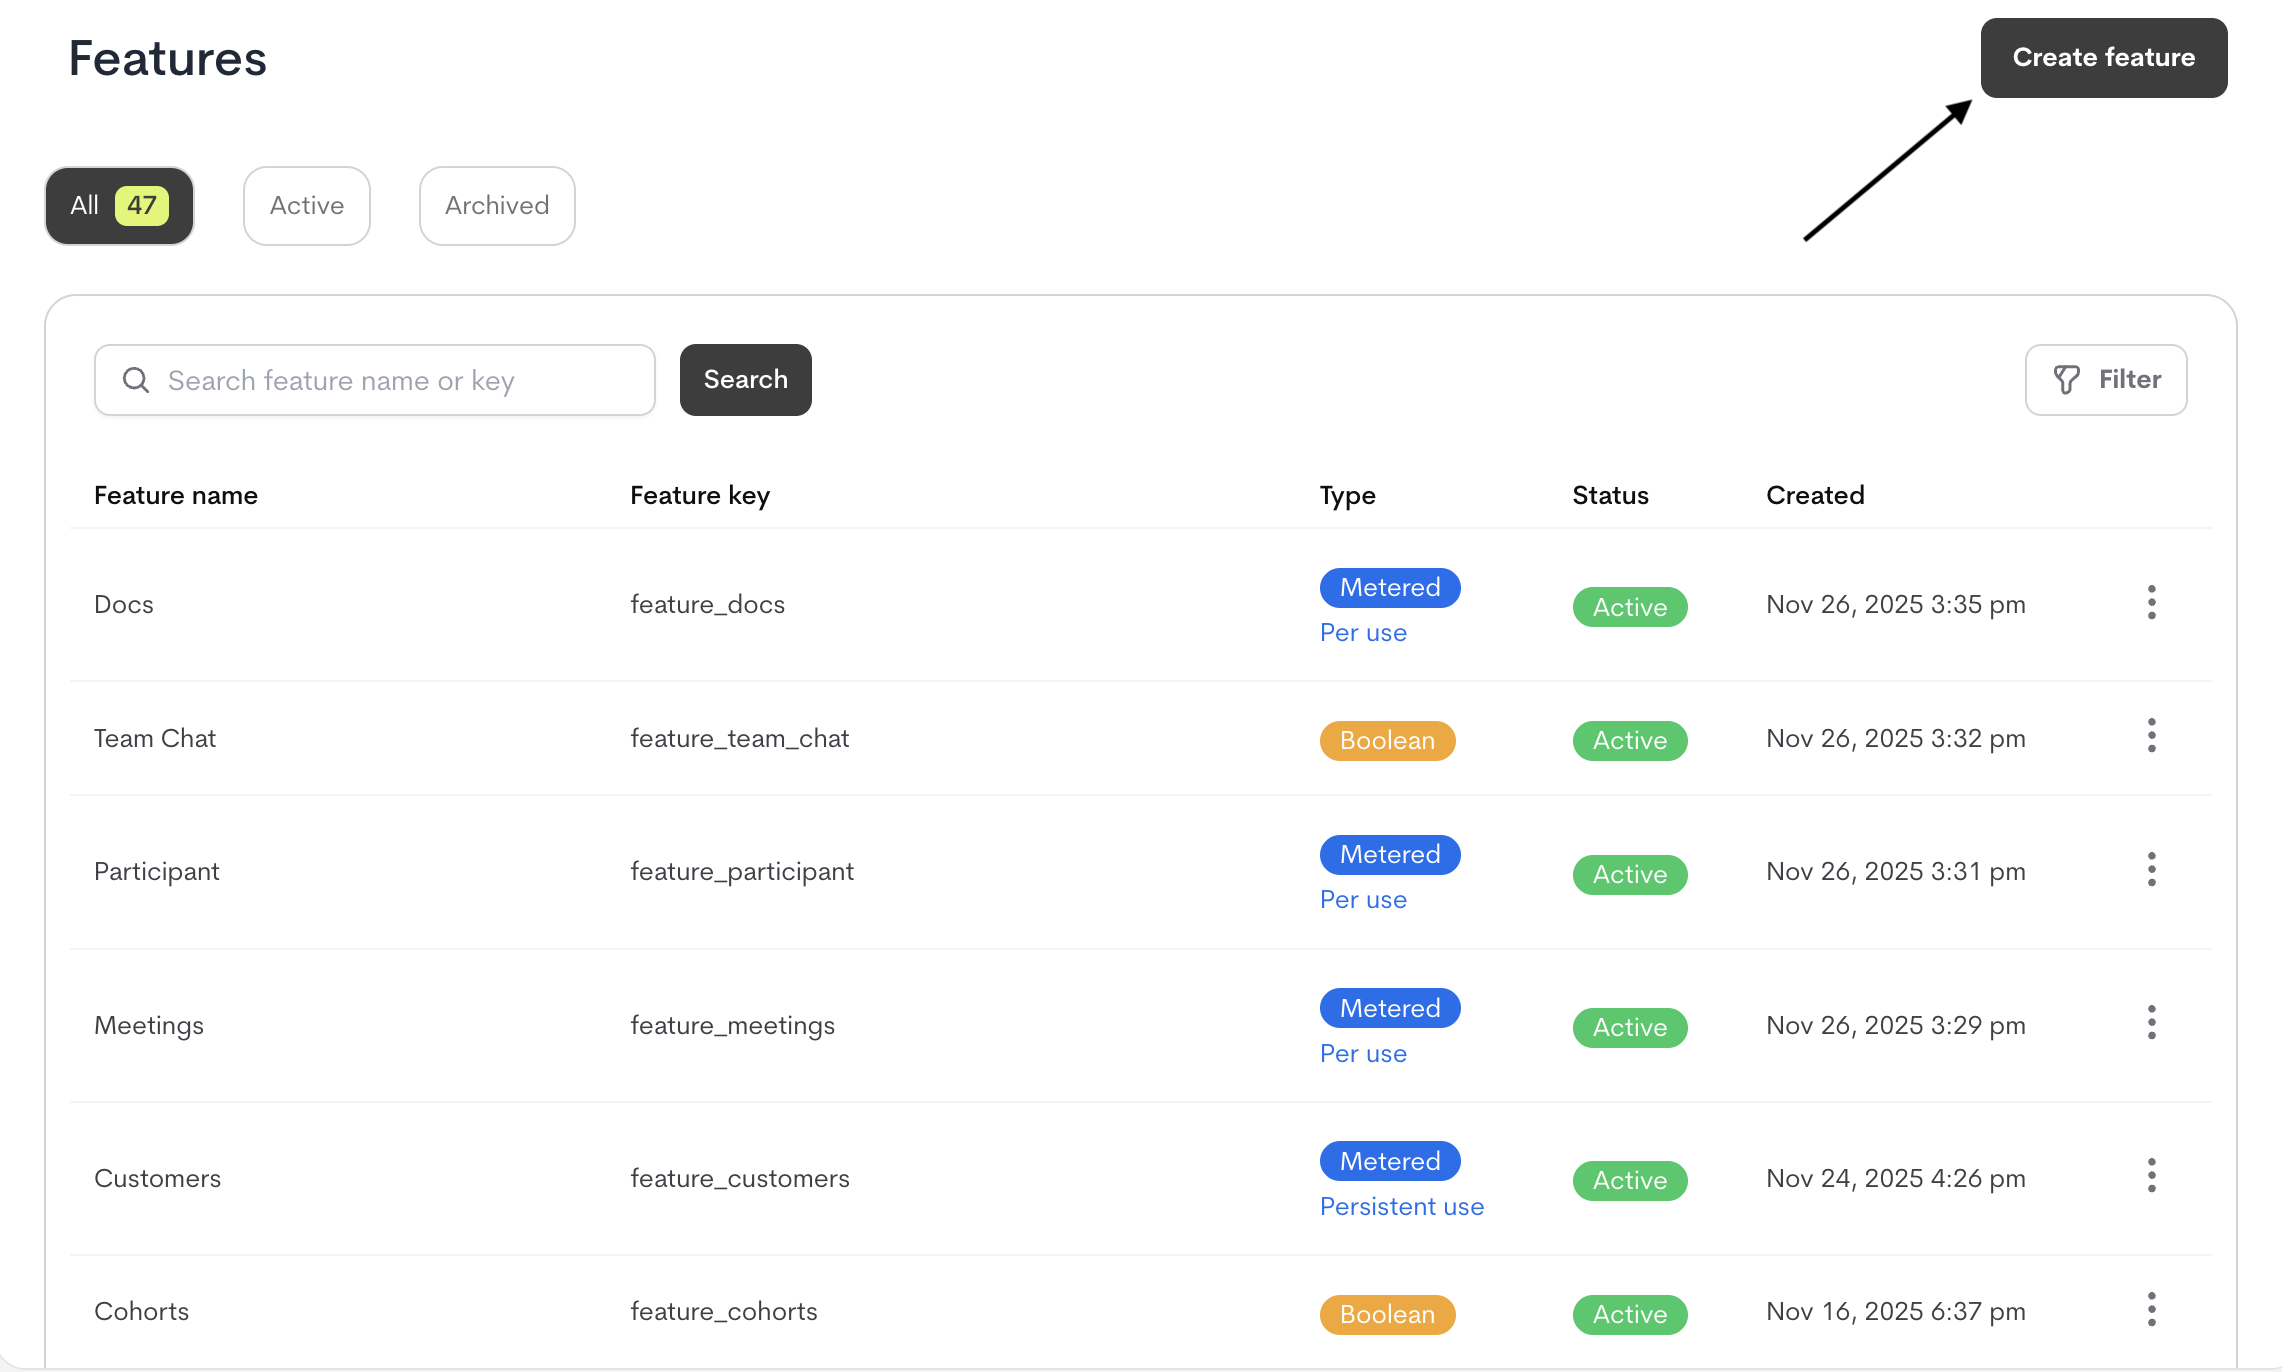
Overview
Features are the foundational units of monetization in Metrifox. They represent monetizable functionality, resource or value in your product, enabling flexible pricing, packaging, and usage tracking. Once you integrate Metrifox with your codebase, you can create and monetize unlimited features, without additional engineering work. This lets you experiment with pricing, packaging, and easily track its usage, control who has access to it, and include it in different pricing plans, add-ons or single purchases entirely from the Metrifox dashboard. Think of features as the core components you use to build your pricing models. Instead of just creating a plan for “premium,” you can break down your product into individual features like:- Boolean features: A simple on/off function, such as “access to analytics dashboard.”
- Metered features: A function that is tracked by usage or outcome, such as “500 API calls per month”, “monthly active users” or “qualified lead”
Creating a feature
- Navigate to the Catalog section in Metrifox.
- Open the Features sub-section.
- Click the “Create Feature” button.
- A modal is displayed for you to define the Feature details
| Field | Description | Recommendations |
|---|---|---|
| Feature Name | A clear, descriptive name for the feature (e.g., “API Calls per Month”). | Use customer-friendly naming for internal clarity. |
| Description (Optional) | Additional context about the feature’s purpose or usage. | Helpful for cross-team alignment (e.g., finance, product). |
| Feature Key | Provide a feature key, or allow Metrifox to auto-generate a unique identifier. | Used to reference the feature in your application code (e.g., api_calls_monthly). |
| Unit Label | Sets the singular and plural names for the unit of measurement shown on invoices, customer dashboards, and usage reports. | Required for Metered features; optional (but recommended) for Boolean. Examples: • Singular: call → Plural: calls, • Singular: seat → Plural: seats |
| Feature Type | Defines how the feature is tracked and billed. | Options: - Boolean: On/off access (e.g., “Premium Support”). - Meter: Usage, outcome, (e.g., “API Calls”). |

Metered Features Settings (appear only when Metered is selected)
These settings become available only when Metered is selected:Select Feature Type
Choose “Metered” as the feature type when creating a new feature that you want to be tracked by usage or outcome.
Configure Metering
Metered features require the following settings:1. Usage Type (Required)Defines how usage is recorded and reset:
- PER USE
- Discrete, event-based actions (e.g., API calls, emails sent).
- Usage resets at the end of each reset period.
- PERSISTENT USE
- Ongoing usage that accumulates (e.g., storage, seats).
- Does not reset; capacity limits can be adjusted.
- A unique label to send usage data or outcome event for metering, multiple event names are supported(comma-seperated). e.g.,
image_generated,api_call_executed.
| Metric | Use Case | Example |
|---|---|---|
SUM | Total usage (e.g., bytes stored). | SUM(storage_bytes) |
COUNT | Number of events (e.g., API calls). | COUNT(api_requests) |
COUNT_UNIQUE | Unique instances (e.g., users). | COUNT_UNIQUE(user_id) |
MIN/MAX | Peak/floor values (e.g., temperature). | MAX(concurrent_connections) |
LATEST | Last recorded value. | LATEST(account_balance) |
AVERAGE | Mean value over time. | AVERAGE(cpu_usage) |
Managing Your Features
Navigate to the feature list in the Catalog section. From the list of features on the feature page, click the three dots (⋮) menu next to any feature to access management options.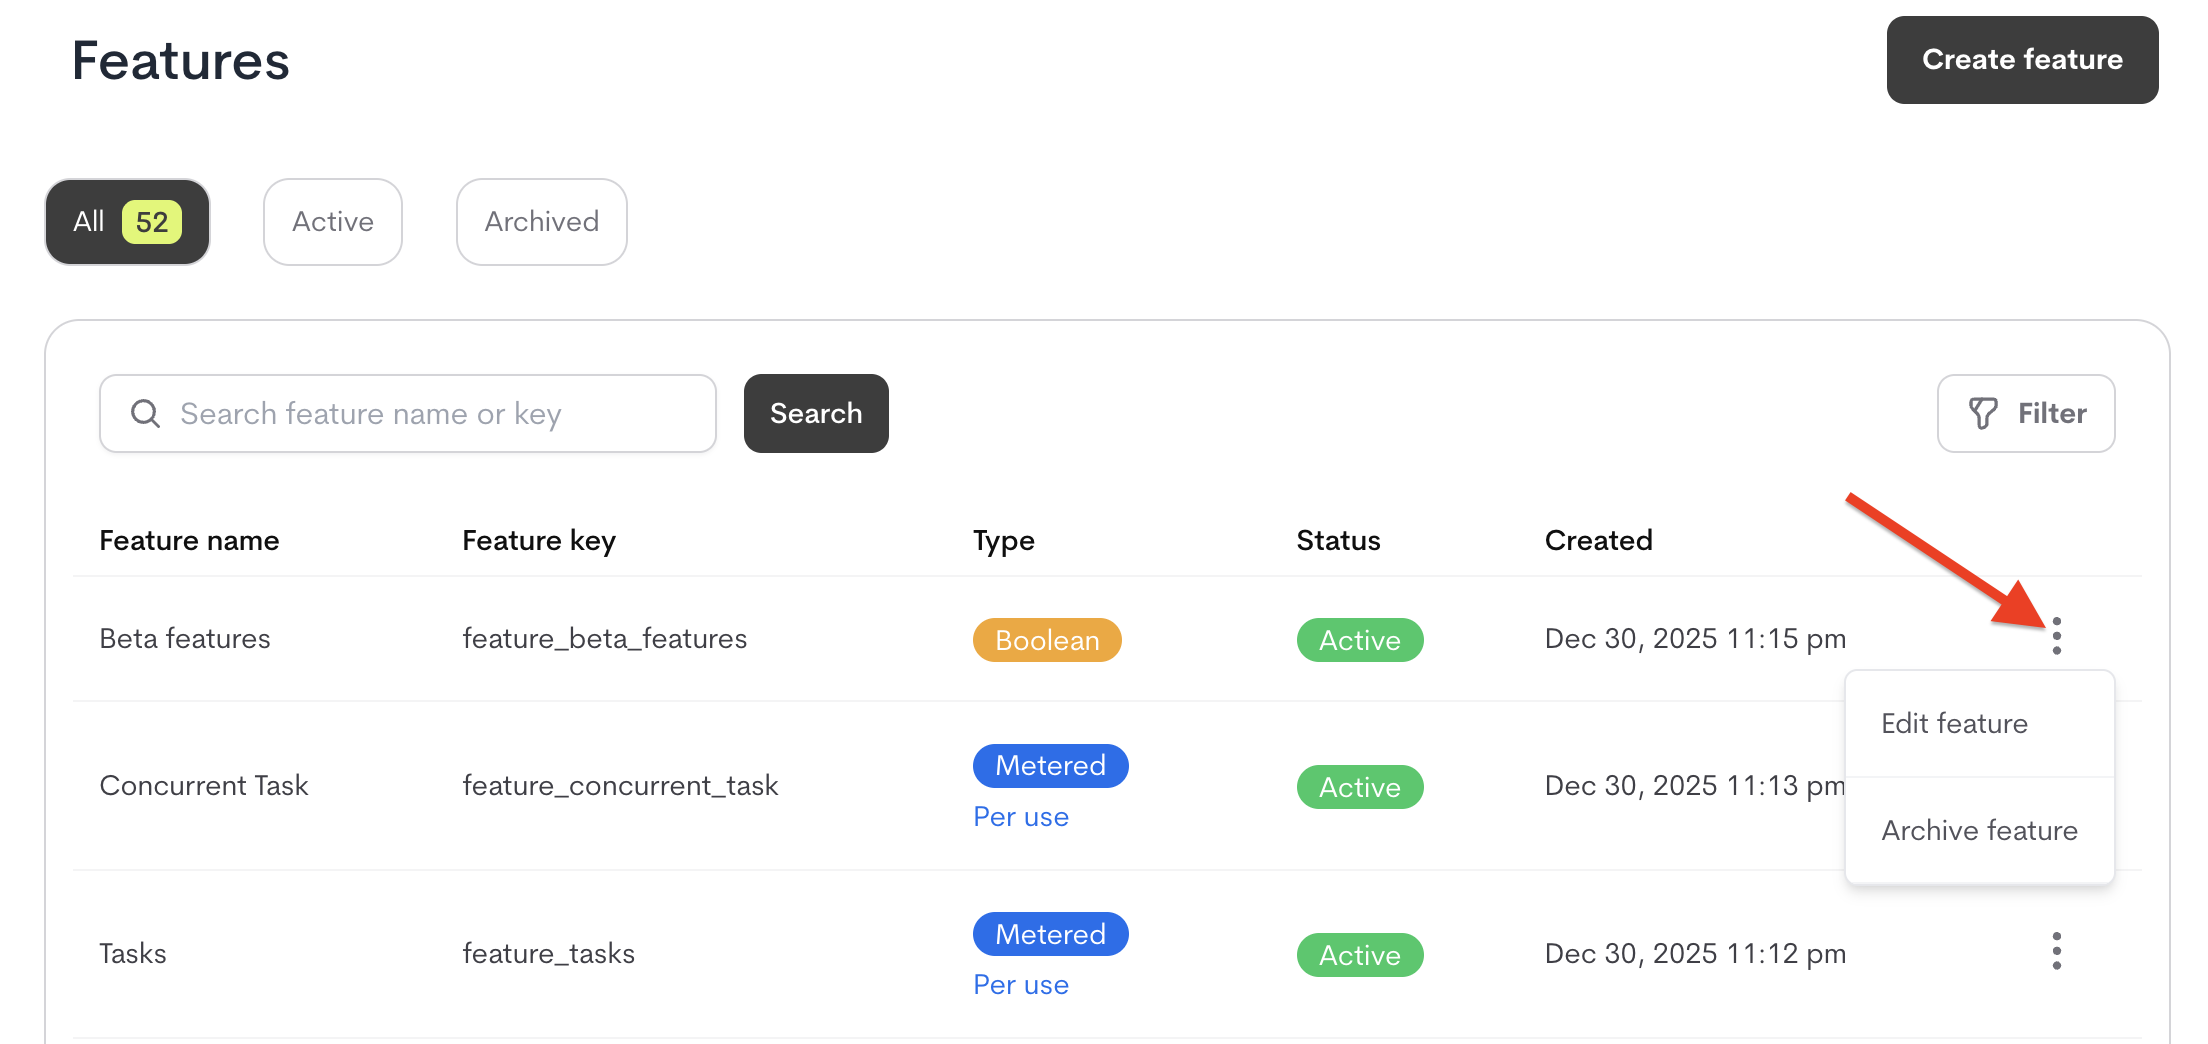
Editing a Feature
To edit a feature:- Locate the Feature
- Click the ⋮ menu icon on the feature’s row
- Select edit
- Update Fields
- Edit any editable fields (Feature name, description, units, etc.)
- Note: Certain properties like the Feature Key and Feature type cannot be modified after creation or if the feature is in use.
- Save Changes
- Click ”Save Changes” to apply your updates.
Archiving Features
When a feature is no longer needed for new customers but may still remain active for existing ones, it can be archived.What Happens When You Archive a Feature?
- Removed from selection lists: Won’t appear when creating new plans/add-ons.
- Existing access preserved: Current customers keep access through old plan or add-ons versions
- Feature key remains reserved: Cannot be reused for new features
How to Archive a Feature
- Click the ⋮ menu icon on the feature’s row
- Select “Archive feature”
- In the confirmation modal:
- Click the “Archive feature” button
Prerequisites for Archiving
- The feature must not be used in any published plans or add-ons
- If in use:
- Create new versions of affected plans/add-ons without the feature
- Publish the new versions
- Then archive the feature